
Executing a major home renovation project is one of the most significant financial and emotional investments a homeowner can make. Whether you are updating an aging structure, expanding your living footprint, or completely re-imagining an outdated floor plan, managing a large-scale home overhaul requires far more than just design inspiration and a toolkit. It demands rigorous organization, clear communication, precise sequencing, and realistic budgeting.
Without a well-planned execution strategy, complex home improvements can quickly succumb to compounding delays, blown budgets, and high stress levels. When tackling projects that touch structural, mechanical, and cosmetic systems simultaneously, the secret to success lies in breaking down the chaos into managed, logical steps. This comprehensive blueprint will walk you through the proper phases of a major renovation—from early logistical preparation to final cleanup—ensuring your project stays on schedule, on budget, and built to last.
Phase 1: Planning, Budgeting, and Waste Management

Before tearing down walls or pulling off old siding, you must establish a firm operational foundation. The initial planning phase dictates whether your job site runs like a fine-tuned machine or dissolves into disarray.
Establishing a Realistic Financial Framework
A successful project begins with an accurate, detailed budget that accounts for both expected expenses and surprise conditions.
- Build a Contingency Buffer: Always set aside 15% to 20% of your total budget for unforeseen issues, such as outdated wiring behind drywall, structural rot, or hidden plumbing leaks.
- Get Itemized Bids: Require detailed line-item quotes from every trade contractor rather than lump-sum estimates. This allows you to prioritize features if you need to scale back the project scope later.
- Sequence Purchases: Order long-lead items like custom cabinetry, specialty windows, and imported tile well in advance to prevent trade workers from idling while waiting on materials.
Navigating Permits and Site Preparation
Ignoring municipal regulations can halt your project mid-build and cause major headaches down the road. Verify local zoning laws, secure necessary building permits for structural or mechanical work, and notify your homeowners insurance provider about the ongoing construction.
Managing Site Waste and Construction Debris
Demolition generates an immense volume of waste far faster than most homeowners anticipate. Old framing, broken plaster, drywall scrap, and torn-out flooring can create immediate safety hazards if left piled up inside or around your home.
Establishing an effective waste management strategy on-site requires a few essential preparation steps before demolition begins. First, reserve any necessary municipal right-of-way or driveway parking permits required for heavy waste containers. You should also create a sorting system to separate recyclable metals and masonry from general construction debris, and set up daily containment protocols for hazardous dust, lead paint, or legacy insulation. Finally, ensure all walkways and pathways leading from interior exit doors to your primary debris area remain broad and completely unobstructed.
To maintain an efficient work environment, rent a dedicated roll off container prior to day one of demolition. Positioning a high-capacity waste vessel right on your driveway ensures workers can discard heavy debris immediately, keeping pathways clear, reducing foot-injury hazards, and preventing job-site bottlenecks.
Phase 2: Structural Repairs and Exterior Upgrades
Once demolition is complete, your primary objective must be securing the building envelope. You should never install new interior materials—such as expensive insulation, drywall, or custom cabinetry—until you are certain the structure is completely watertight and structurally sound.
Fortifying the Building Envelope
Inspect your home’s rooflines, foundational footers, structural framing, and flashing for signs of age or water damage. Addressing structural issues right away prevents new interior finishes from shifting or suffering water intrusion later.
- Fix Water Damage First: Replace rotted roof decking, damaged fascia boards, and compromised wall studs before continuing with interior framing.
- Inspect Foundation Footings: Repair structural masonry cracks or settlement issues early to prevent drywalled walls from cracking down the line.
- Upgrade Windows and Doors: Install high-efficiency exterior windows and entry doors to seal the house against drafts while the wall frames are exposed.
Understanding your choices in low-slope roofing materials is essential when securing flat roof additions, garage extensions, or modern low-slope architecture. EPDM rubber offers an exceptional lifespan of 25 to 30 years and provides outstanding durability and resistance to extreme cold. TPO membranes typically last between 15 and 20 years and stand out for their heat-reflective properties that maximize energy efficiency. PVC single-ply systems also last 20 to 30 years and excel at resisting chemicals, fire exposure, and high-wind environments.
If your property includes flat roof additions, garage extensions, or modern low-slope architecture, hire a qualified flat roofer to thoroughly evaluate the membrane. Low-slope roofing requires specialized seams, proper pitch drainage, and UV-resistant materials to keep water from pooling, making it critical to work with an experienced specialist.
Selecting Industrial-Grade Exterior Finishes
Protecting outbuildings, metal structural beams, exterior trim, and steel siding requires specialized surface treatments designed to withstand extreme weather.
Consult with a knowledgeable metal roof and building paint supplier to source industrial-grade primers, elastomeric coatings, and weather-resistant paints. Using high-performance materials matched to your specific substrate protects your structural investments from rust, premature peeling, and severe sun damage.
Phase 3: Plumbing and Core Utility Overhauls

With the building envelope secure, you can move on to roughing in main utilities. Mechanical, electrical, and plumbing upgrades must be completed while the wall studs are exposed, long before any insulation or drywall is installed.
Roughing in core utilities requires a strict step-by-step sequence to avoid retrofitting work later in the build. The process must begin with a comprehensive subterranean main line audit to map out existing underground pipes. Once the main line is evaluated, contractors should perform a thorough drain line and sewer hydrojetting to clear out long-standing obstructions. Following drainage clearance, private well systems require a complete well pump and pressure test to verify output capacity. Only after these core infrastructure systems are fully vetted should your trades begin installing in-wall mechanical, electrical, and plumbing rough-ins.
Upgrading Subterranean and Main Drainage Lines
Before modernizing your kitchen or bathrooms, ensure your subterranean sewer infrastructure can handle the updated demand.
- Perform Scope Inspections: Run a fiber-optic camera through your main waste line to identify tree root invasions, bellied pipes, or structural cracks.
- Clear Main Lines: Invest in thorough drain cleaning to eliminate years of grease build-up, heavy mineral deposits, and debris before connecting new branch lines.
- Install Backflow Preventers: Add main sewer check valves to protect lower-level living spaces from municipal main backups during severe storms.
Auditing Water Supply Systems
For properties relying on private wells or low-pressure municipal supply networks, expanding living spaces or adding bathrooms can strain water delivery. Partner with a certified local water pump service to test your pump’s flow rate, check pressure tank bladders, and service electrical controls. Ensuring your water system can maintain consistent pressure across all fixtures prevents frustrating performance drops when multiple taps are running.
Phase 4: Modernizing Kitchen, Bath, and Interior Systems
With utility mains tested and cleared, focus turns to updating internal distribution networks and roughing in fixtures across kitchens, bathrooms, and utility rooms.
Reconfiguring Interior Plumbing Layouts
Redesigning kitchens and bathrooms often requires moving wet walls, relocating waste stacks, and running fresh supply lines.
During the plumbing rough-in stage, adhering to strict quality checks guarantees long-term reliability hidden inside your walls. First, systematically convert all legacy galvanized steel or polybutylene pipes over to modern PEX or copper lines. Next, install localized shut-off valves at every individual fixture location to simplify future maintenance. To eliminate annoying pipe movement and water hammer noise, strap all water supply lines securely to internal wall studs. Finally, perform a comprehensive pressure test on all new water lines before closing up the surrounding studs with insulation and drywall.
Always collaborate with a licensed local plumber to reconfigure interior layouts, ensure waste lines carry the proper pitch, and verify all work meets current building codes. Professional installation prevents hidden pinhole leaks and improperly vented drains, protecting your fresh drywall, subfloors, and cabinetry from costly moisture damage.
Updating Electrical and HVAC Networks
Modern living demands updated electrical panels and efficient climate control.
- Panel Upgrades: Upgrade your electrical service panel to 200 amps (or higher) to easily support modern kitchen appliances, EV chargers, and multi-zone HVAC units.
- Dedicated Circuits: Run dedicated electrical circuits for heavy-draw appliances like microwave drawers, induction ranges, and electric water heaters.
- Ductwork Optimization: Inspect and seal exposed HVAC ductwork, adding supply and return vents to newly configured rooms to maintain balanced airflow.
Phase 5: Outdoor Living Spaces and Driveway Restoration
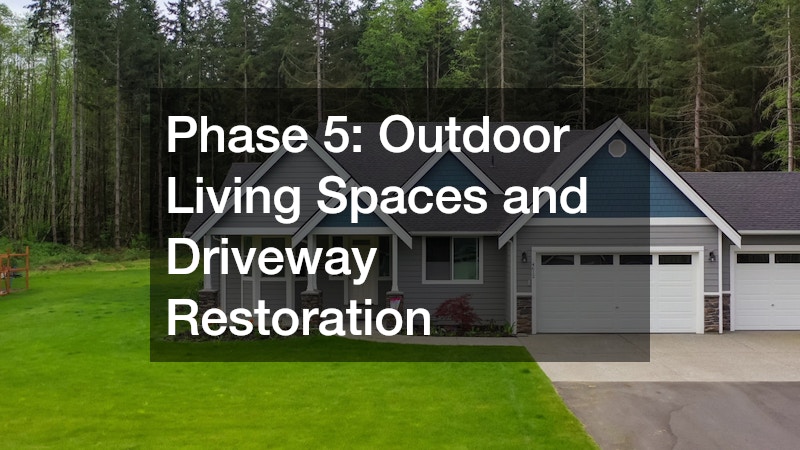
As interior rough-ins wrap up and trade work moves toward decorative finishes, direct some attention outdoors to ensure your home’s exterior spaces match your updated interior.
Revitalizing Outdoor Recreation Areas
If your property features an existing pool, coordinate its restoration alongside your house project to streamline contractor visits and equipment access.
- Inspect Pool Shells: Check aged plaster, tile lines, and coping stones for structural cracks, delamination, or active leaks.
- Upgrade Filtration Mechanics: Swap out old single-speed pumps and filters for modern variable-speed equipment to drastically lower monthly energy bills.
- Execute Surface Resurfacing: Schedule a full swimming pool renovation to replace outdated tile, update underwater LED lighting, and apply modern quartz or pebble aggregate finishes. Completing outdoor work while contractors are already on-site saves money on mobilization costs.
Restoring Driveway and Hardscape Surfaces
Heavy delivery trucks, utility vehicles, and heavy dumpsters take a toll on driveways during a major build. Once major construction wraps up, inspect your asphalt and concrete surfaces for damage.
Protecting and preserving asphalt surfaces requires specific maintenance steps timed carefully after construction finishes. The moment structural cracks appear, fill them immediately to prevent water from penetrating through to the sub-base and eroding the foundation. Prior to applying any protective coatings, conduct a thorough surface cleaning to clear out oil, dirt, and debris so the chemical sealant can bond effectively. Finally, apply a professional asphalt sealcoating every two to three years to guard against UV oxidation, shield the pavement from fuel spills, and maintain a fresh appearance.
Fill structural cracks, patch potholes, and apply a high-grade asphalt sealcoating to your driveway. This protective barrier seals out moisture, guards against UV oxidation, and restores a deep black finish that instantly refreshes your property’s curb appeal.
Phase 6: Protecting Belongings and Final Transition
The home stretch of any renovation involves fine finishing, deep cleaning, and transitioning back into your refreshed living space. Managing this phase carefully keeps your furniture and personal items safe from rogue dust and moving damage.
Executing a seamless transition back into your renovated home requires taking precise protective actions during the final finishing work. Clear out all active living zones completely before workers begin fine drywall sanding, trim work, or floor finishing. Transport valuable electronics, artwork, and soft furnishings to off-site, climate-controlled storage facilities to prevent damage. During the messiest sanding stages, run industrial HEPA air scrubbers indoors to continuously capture airborne particulate matter. Once the site passes deep cleaning, hire professional movers or a local moving company to safely bring heavy furniture back into the renovated spaces without damaging freshly painted walls or polished floors.
Safeguarding Furnishings During Final Finishes
Dust from sanding drywall, finishing floors, and applying trim paint penetrates every corner of a home. Protecting your furniture and sensitive electronics requires more than just throwing drop cloths over them.
Before trade workers start final floor sanding or spray painting, pack up delicate items and hire professional movers to transport your furniture into secure, off-site storage. Clearing living spaces completely gives painters and floor installers room to work quickly, while guaranteeing your belongings remain dust-free and safe from accidental bumps.
Using This Guide for Home Renovation and Improvement Projects

Tackling a major home renovation is a marathon, not a sprint. By following a clear, phased approach—securing the building envelope, updating core utility infrastructure, modernizing finishes, and finishing with outdoor spaces—you can navigate even the most complex projects with confidence.
Prioritizing proper planning, assembling the right team of skilled specialists, and respecting the logical order of construction ensures your project stays on track. The result is a safe, beautifully updated home built to bring you comfort, function, and increased property value for years to come.